
Last week, I filled the Game Boy screen with a single tile. Today, I’m expanding on that concept by creating and displaying my first tilemap. This is the first step towards crafting more intricate and engaging visuals on the Game Boy.
What is a Tilemap?
A tilemap is essentially data representing a grid composed of numerous “tiles.” Tilemaps offer a concise way to represent larger images in a game. Instead of storing an entire screen as a single image, you can break it down into smaller, reusable pieces. This method is particularly beneficial for the Game Boy, given its limited memory and processing power.
Game Boy Tilemaps
Game Boy tilemaps are 32x32 grids, with each cell representing a single tile. I saw last week how Game Boy tiles are 8x8 pixels, so a 32x32 grid of tiles would be 256x256 pixels. This is actually larger than the Game Boy screen, which is only 160x144 pixels, meaning I won’t see the entire tilemap at once. Later on, I’ll explore how to scroll the tilemap to view different sections; however, for now, I’ll focus on only the visible portion of the tilemap.
Storing Tilemaps
In order to utilize a tilemap, it must be stored in the correct memory location. On the Game Boy, this is located at $9800 in VRAM. For more detailed information on this, check out Pan Docs - VRAM Tile Maps.
Indexing Tiles
What data is actually loaded into $9800? This address is reserved for data that indexes the tiles intended for display. Each tile in VRAM is assigned a unique index. For example, the first tile in tile memory is indexed as 0, and the second as 1. Specifically, the tile positioned at $9000 is indexed by 0, while the one at $9010 follows as 1, illustrating the hexadecimal notation where $9010 is 16 bytes beyond $9000.
Tilemap Data
The Game Boy provides 256 tile indices to work with, and each tile index in the tilemap is represented by a single byte. Consequently, to display an entire tilemap, it’s necessary to load 32x32 bytes into VRAM at $9800. This allows for the representation of a full 32x32 grid of tiles.
The Code
I’ve created a simple example to demonstrate how to load a single tilemap into VRAM. The code for this can be found on my GitHub: bradyaanderson/gb-examples. Let’s break down the code by examining each file.
hardware.inc
Like last time, this file contains the standard hardware definitions for the Game Boy.
main.asm
main.asm serves as the main program file, just as before. I’ve implemented a few modifications since last week.
CopyTiles
The subroutine for copying a tile to the correct place in VRAM now handles two tiles instead of one—quite an upgrade!
    ; Copy the tile data
    ld de, Tiles
    ld hl, $9000 ; Starting address in VRAM for tile data
    ld bc, 32 ; 16 bytes per tile; load 2 tiles this time
CopyTiles:
    ld a, [de]
    ld [hli], a
    inc de
    dec bc
    ld a, b
    or a, c
    jp nz, CopyTiles
CopyTilemap
This new subroutine is tasked with copying the tilemap into VRAM. It closely mirrors the CopyTiles subroutine but targets the VRAM address $9800 instead of $9000. The approach comes directly from the GB ASM Tutorial.
    ; Copy the tilemap
    ld de, Tilemap
    ld hl, $9800
    ld bc, TilemapEnd - Tilemap
CopyTilemap:
    ld a, [de]
    ld [hli], a
    inc de
    dec bc
    ld a, b
    or a, c
    jp nz, CopyTilemap
tiles.asm
Reflecting the update to load two tiles into memory, I’ve renamed this file from tile.asm to tiles.asm. This file contains the data needed to load two tiles into VRAM. To simplify, these tiles are designed as solid colors—white and black—using the default palette.
INCLUDE "hardware.inc"

SECTION "Tile data", ROM0

Tiles::
  db $00,$00,$00,$00,$00,$00,$00,$00,$00,$00,$00,$00,$00,$00,$00,$00
  db $ff,$ff,$ff,$ff,$ff,$ff,$ff,$ff,$ff,$ff,$ff,$ff,$ff,$ff,$ff,$ff
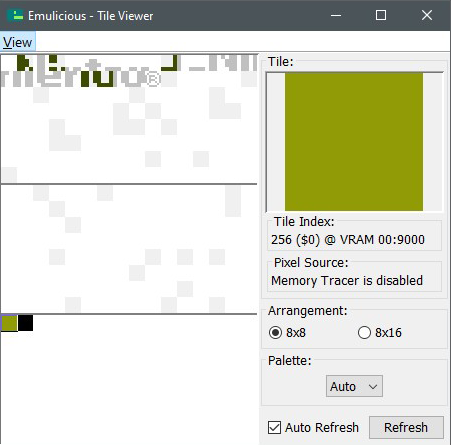
The Tile Viewer Tool in Emulicious, showing the tiles in memory. Toward the bottom left are the two tiles I loaded.
tilemap.asm
Now, I finally get to the tilemap! This file contains the data for a single tilemap using the two tiles mentioned above. Each byte represents the index of a tile, making it straightforward to understand. In this file, each hex pair signifies one tile index. This arrangement ensures the tilemap is easy to interpret, as each line corresponds to a row in the tilemap.
INCLUDE "hardware.inc"

SECTION "Tilemap Data", ROM0

Tilemap::
  ; The tilemap is 32x32 tiles in size. However, only 20x18 tiles are visible on the screen at once.
  ; The first 20 bytes in a row are visible on the screen without scrolling. The next 12 are off screen, so we'll just set them to 0.
  db $00, $01, $00, $01, $00, $01, $00, $01, $00, $01, $00, $01, $00, $01, $00, $01, $00, $01, $00, $01,  0,0,0,0,0,0,0,0,0,0,0,0
  db $01, $00, $01, $00, $01, $00, $01, $00, $01, $00, $01, $00, $01, $00, $01, $00, $01, $00, $01, $00,  0,0,0,0,0,0,0,0,0,0,0,0
  db $00, $01, $00, $01, $00, $01, $00, $01, $00, $01, $00, $01, $00, $01, $00, $01, $00, $01, $00, $01,  0,0,0,0,0,0,0,0,0,0,0,0
  db $01, $00, $01, $00, $01, $00, $01, $00, $01, $00, $01, $00, $01, $00, $01, $00, $01, $00, $01, $00,  0,0,0,0,0,0,0,0,0,0,0,0
  db $00, $01, $00, $01, $00, $01, $00, $01, $00, $01, $00, $01, $00, $01, $00, $01, $00, $01, $00, $01,  0,0,0,0,0,0,0,0,0,0,0,0
  db $01, $00, $01, $00, $01, $00, $01, $00, $01, $00, $01, $00, $01, $00, $01, $00, $01, $00, $01, $00,  0,0,0,0,0,0,0,0,0,0,0,0
  db $00, $01, $00, $01, $00, $01, $00, $01, $00, $01, $00, $01, $00, $01, $00, $01, $00, $01, $00, $01,  0,0,0,0,0,0,0,0,0,0,0,0
  db $01, $00, $01, $00, $01, $00, $01, $00, $01, $00, $01, $00, $01, $00, $01, $00, $01, $00, $01, $00,  0,0,0,0,0,0,0,0,0,0,0,0
  db $00, $01, $00, $01, $00, $01, $00, $01, $00, $01, $00, $01, $00, $01, $00, $01, $00, $01, $00, $01,  0,0,0,0,0,0,0,0,0,0,0,0
  db $01, $00, $01, $00, $01, $00, $01, $00, $01, $00, $01, $00, $01, $00, $01, $00, $01, $00, $01, $00,  0,0,0,0,0,0,0,0,0,0,0,0
  db $00, $01, $00, $01, $00, $01, $00, $01, $00, $01, $00, $01, $00, $01, $00, $01, $00, $01, $00, $01,  0,0,0,0,0,0,0,0,0,0,0,0
  db $01, $00, $01, $00, $01, $00, $01, $00, $01, $00, $01, $00, $01, $00, $01, $00, $01, $00, $01, $00,  0,0,0,0,0,0,0,0,0,0,0,0
  db $00, $01, $00, $01, $00, $01, $00, $01, $00, $01, $00, $01, $00, $01, $00, $01, $00, $01, $00, $01,  0,0,0,0,0,0,0,0,0,0,0,0
  db $01, $00, $01, $00, $01, $00, $01, $00, $01, $00, $01, $00, $01, $00, $01, $00, $01, $00, $01, $00,  0,0,0,0,0,0,0,0,0,0,0,0
  db $00, $01, $00, $01, $00, $01, $00, $01, $00, $01, $00, $01, $00, $01, $00, $01, $00, $01, $00, $01,  0,0,0,0,0,0,0,0,0,0,0,0
  db $01, $00, $01, $00, $01, $00, $01, $00, $01, $00, $01, $00, $01, $00, $01, $00, $01, $00, $01, $00,  0,0,0,0,0,0,0,0,0,0,0,0
  db $00, $01, $00, $01, $00, $01, $00, $01, $00, $01, $00, $01, $00, $01, $00, $01, $00, $01, $00, $01,  0,0,0,0,0,0,0,0,0,0,0,0
  db $01, $00, $01, $00, $01, $00, $01, $00, $01, $00, $01, $00, $01, $00, $01, $00, $01, $00, $01, $00,  0,0,0,0,0,0,0,0,0,0,0,0
TilemapEnd::
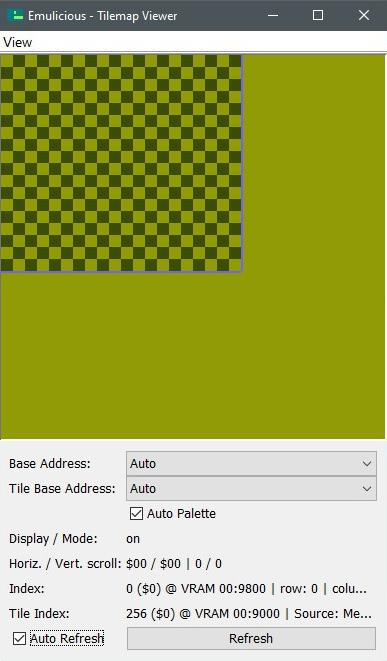
The Tilemap Viewer Tool in Emulicious showing the tilemap I created.
Tilemap and TilemapEnd
These labels are crucial for calculating the size of the tilemap data. As seen in the CopyTilemap subroutine, the size is determined by subtracting the TilemapEnd label from the Tilemap label.
What’s up with the 0,0,0,0,0,0,0,0,0,0,0,0 on each line?
This line of zeros acts as padding to fill out the rest of the tilemap. Although only a 20x18 tile area is visible on the screen at one time, this padding extends the tilemap to a full 32x32 size. While $00 could also be used to represent each tile, using 0 is more readable.
Makefile
I have included a Makefile again to simplify the compilation of the ROM. Simply run make in the terminal while in the project directory to build the ROM.
Testing My First Tilemap
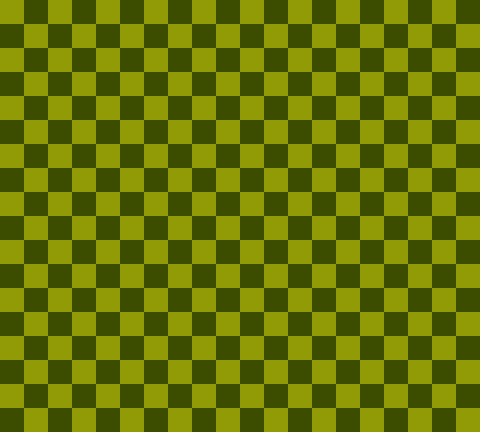
A screenshot of my checkerboard tilemap.
After building the ROM, I fired up first-tilemap.gb in Emulicious and was greeted with a checkerboard pattern composed of black and white tiles.
Wrapping Up
There it is: my first tilemap! While this is an extremely simple example, it’s easy for me to envision how using more complex tiles and a more intricate tilemap could create a screen full of interesting visuals. I think this is precisely what I should explore next. Stay tuned!