Last time, I explored how to encode a Game Boy tile. Today, I want to take it a step further by displaying a tile on the screen.
Getting Started
Before I could get started, I needed to learn how to create my first Game Boy ROM. There are many tools available, but I chose RGBDS, the most popular assembler and linker for developing Game Boy applications today. It is well-documented and supported by a large community, which is ideal for a beginner like me. I’m also aiming to work as close to the hardware as possible, which is why I’ve opted for assembly language over higher-level tools.
I installed RGBDS on my machine and immediately dove into the excellent tutorial provided at GB ASM Tutorial. I highly recommend this tutorial if you’re interested in learning how to make Game Boy games using assembly.
The Code
Now that I had an understanding of how to use RGBDS, I could continue my goal of displaying a tile on the screen. The tutorials I followed actually showed me exactly how to do this; however, I wanted to take a step back and create the most basic example possible.
This led me to create a simple program that would fill the Game Boy’s screen with a single tile. The code for this can be found on my GitHub: https://github.com/bradyaanderson/gb-examples/tree/main/graphics/repeat-tile
I’ll break down the code below.
hardware.inc
This file contains the hardware definitions for the Game Boy. It is sourced directly from the GBdev GitHub repository.
main.asm
This is the main file which contains code to fill the screen with a single tile. Much of this code was sourced directly from the GB ASM Tutorial, but I have made modifications to simplify it for my purposes. I have also added additional comments to clarify what each section does.
INCLUDE "hardware.inc"

SECTION "Header", ROM0[$100]

    jp EntryPoint

    ds $150 - @, 0 ; Make room for the header

EntryPoint:
    ; Shut down audio circuitry
    ld a, 0
    ld [rNR52], a

    ; Wait for VBlank to turn the LCD off safely
WaitVBlank:
    ld a, [rLY]
    cp 144
    jp c, WaitVBlank

    ; Turn the LCD off
    ld a, 0
    ld [rLCDC], a

    ; Copy the tile data
    ld de, Tile
    ld hl, $9000 ; Starting address in VRAM for tile data
    ld bc, 16 ; 16 bytes per tile
CopyTile:
    ld a, [de]
    ld [hli], a
    inc de
    dec bc
    ld a, b
    or a, c
    jp nz, CopyTile

    ; Fill the tilemap with the same tile
    ld hl, $9800 ; Start of background tilemap in VRAM
    ld bc, 32*32 ; The size of the background tilemap
FillScreen:
    ld a, 0 ; Always use tile 0
    ld [hli], a
    dec bc
    ld a, b
    or a, c
    jp nz, FillScreen

    ; Turn the LCD on
    ld a, LCDCF_ON | LCDCF_BGON
    ld [rLCDC], a

    ; Set background palette
    ld a, %11100100
    ld [rBGP], a

Done:
    jp Done
tile.asm
I have separated the tile data from the main code to facilitate easier updates. For this example, I’ve chosen to encode the grass tile from Pokémon Red.
INCLUDE "hardware.inc"

SECTION "Tile data", ROM0

Tile::
  DB $01,$02,$00,$05,$06,$c9,$05,$aa,$20,$9e,$12,$4c,$d0,$2c,$64,$18
Makefile
Finally, I’ve included a Makefile to make it easier to build the ROM. Below, I’ve also provided a resource on how to use a Makefile.
Testing the Tile Display
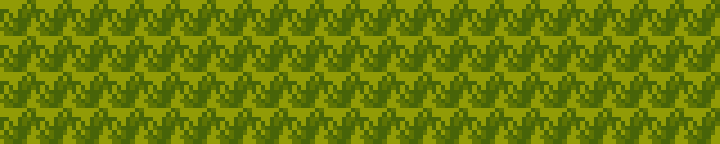
After building the Game Boy ROM using make, I had my first custom Game Boy ROM. This ROM should run on any Game Boy emulator and can even run on a real Game Boy, although I wouldn’t recommend it. I fired up my ROM in Emulicious and was greeted with a screen full of grass tiles.

A screenshot of my “Game” running. Grass tiles cover the screen.
Wrapping Up
I’m really happy with how this project turned out. Seeing my own encoded tile on the screen feels like a significant accomplishment as a new Game Boy developer. Even better, I can easily reuse this program to display any tile I want!